 Pre built UI
Bulk User Import
The Bulk User Import API can be used to import users with both emailpassword and thirdparty recipes simultaneously. Learn more about this API in the CDI specs.
SuperTokens currently supports importing users with BCrypt, Argon2 or Firebase Scrypt password hashes.
important
If you do not have access to your user's password hashes, you can use our guide for migrating them dynamically during login.
Step 1: Prepare the import JSON file#
Convert your existing authentication provider data to the required format as specified here. An example JSON would look like this:
{
  "users": [
    {
      "loginMethods": [
        {
          "recipeId": "emailpassword",
          "tenantIds": ["public"],
          "isVerified": true,
          "isPrimary": true,
          "email": "johndoe@gmail.com",
          "passwordHash": "$argon2d$v=19$m=12,t=3,p=1$aGI4enNvMmd0Zm0wMDAwMA$r6p7qbr6HD+8CD7sBi4HVw",
          "hashingAlgorithm": "argon2",
          "timeJoinedInMSSinceEpoch": 1713260578868
        },
        {
          "recipeId": "thirdparty",
          "tenantIds": ["public"],
          "isVerified": true,
          "isPrimary": false,
          "email": "johndoe@gmail.com",
          "thirdPartyId": "google",
          "thirdPartyUserId": "106347997792363870000",
          "timeJoinedInMSSinceEpoch": 1713260578868
        }
      ]
    }
  ]
}
info
For more info on adding fields like externalUserId, userMetadata, userRoles, and totpDevices, review the examples here.
Importing users With Firebase Scrypt Password hashes
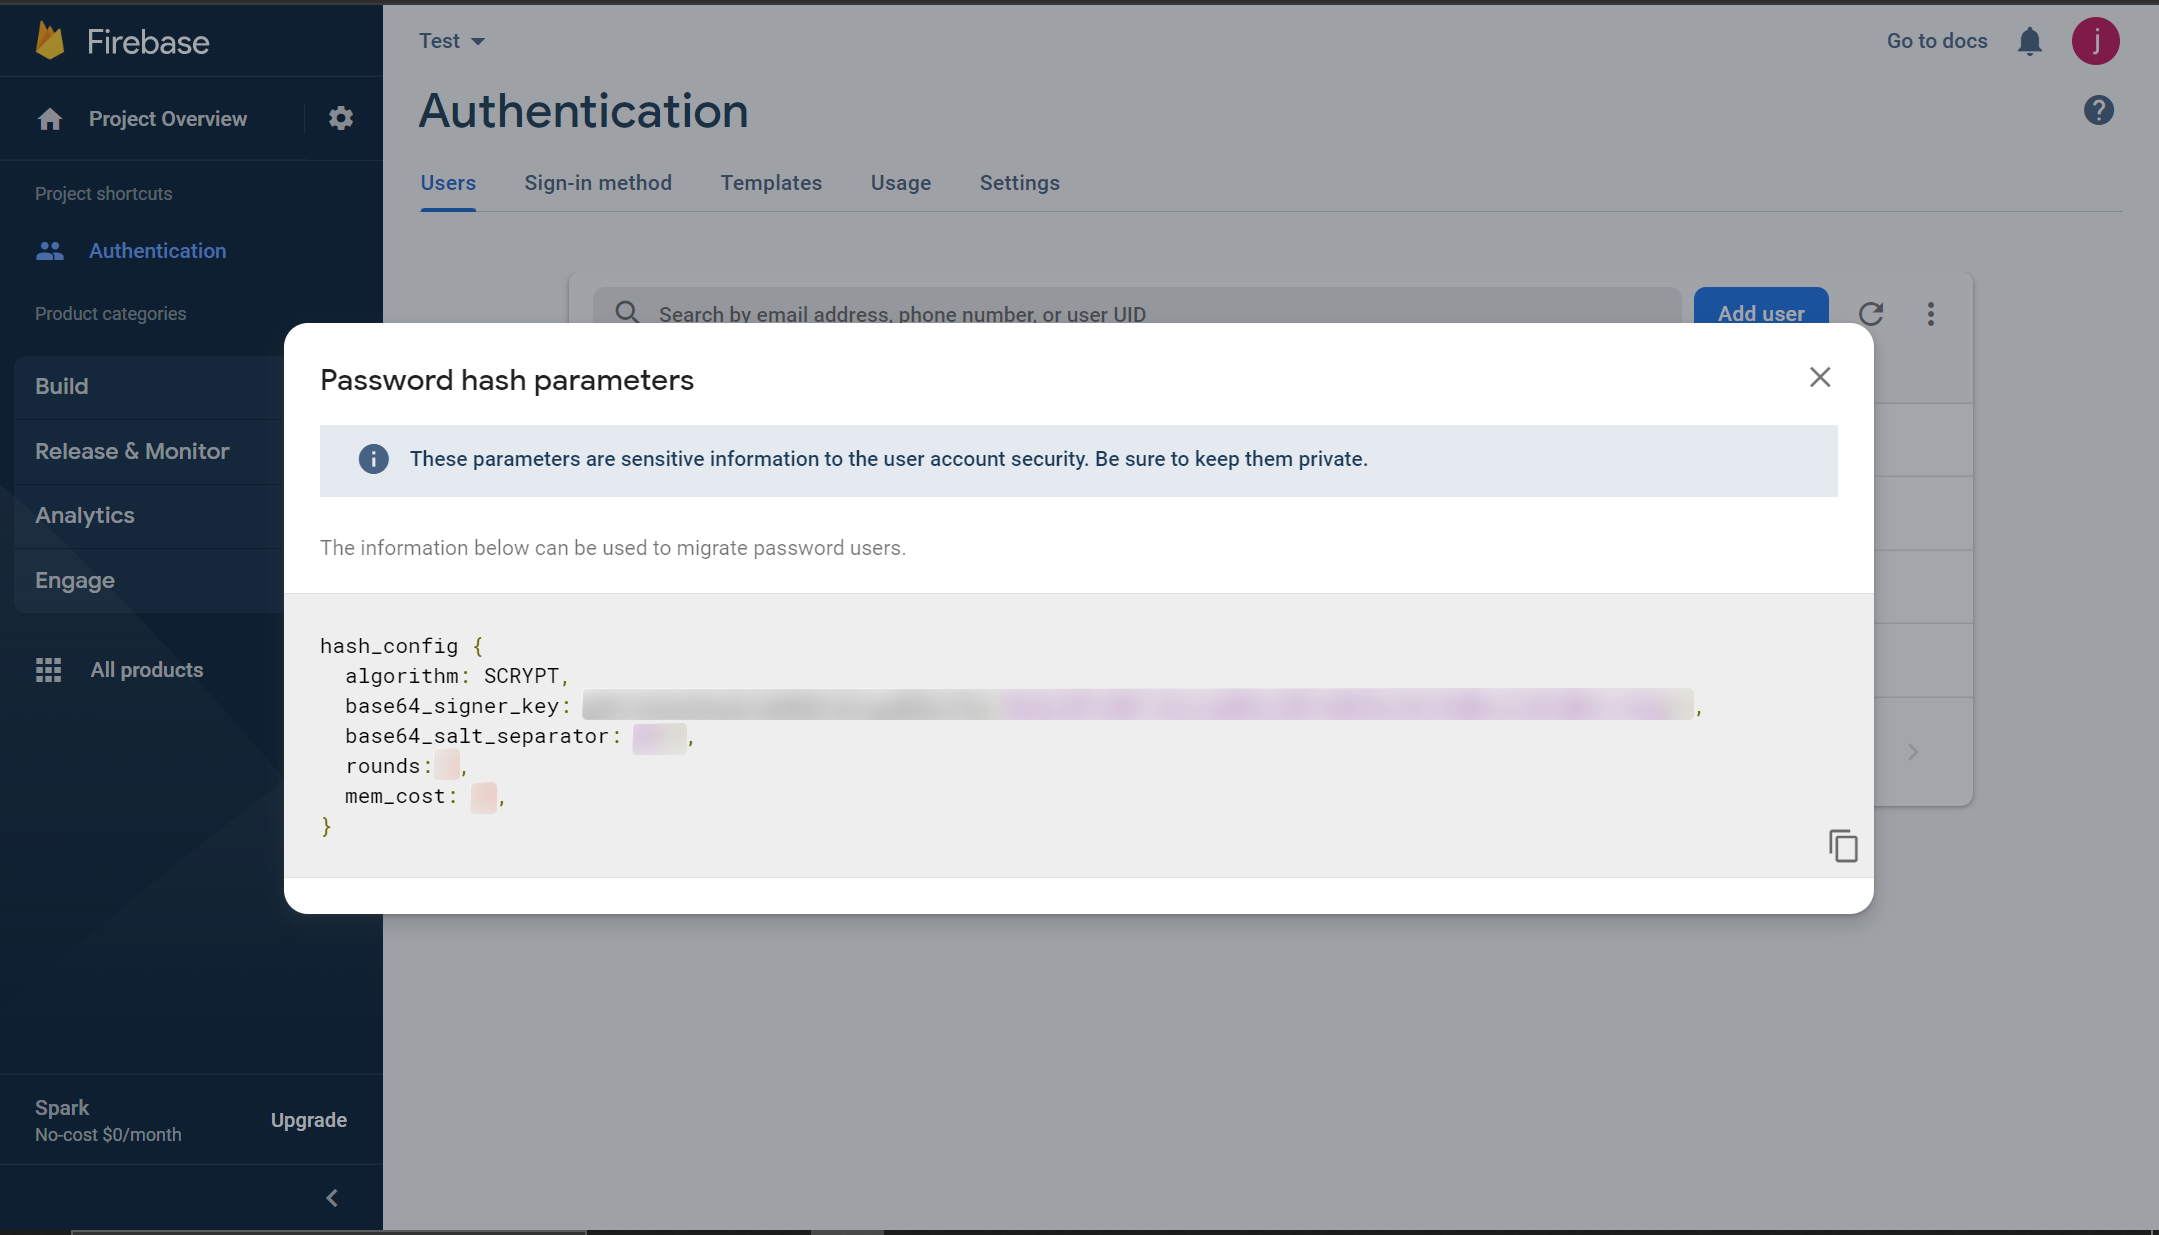
Importing users from Firebases requires an update to your supertokens core config and formatting the input password hash.Step 1: Retrive your Firebase password hashing parameters from your dashboard.#
Step 2: Update the SuperTokens core to use the base64_signer_key#
- Managed service
- Self hosted
- Edit the core configuration in the SuperTokens Managed Service Dashboard.
- Set the
firebase_password_hashing_signer_keyfield in the config to thebase64_signer_keyretrieved from your firebase hashing parameters.
- With Docker
- Without Docker
 docker run \
    -p 3567:3567 \
    -e FIREBASE_PASSWORD_HASHING_SIGNER_KEY="gRhC3eDeQOdyEn4bMd9c6kxguWVmcIVq/HbJKnCXdWscZx0l2WbCJ1wbg==" \
    -d registry.supertokens.io/supertokens/supertokens-<db_name>
# Add your base64_signer_key to the following in the config.yaml file.
# The file path can be found by running the "supertokens --help" command

firebase_password_hashing_signer_key: "gRhC3eDeQOdyEn4bMd9c6kxguWVmcIVq/HbJKnCXdWscZx0l2WbCJ1wbg=="
Step 3: SuperTokens requires firebase password hashes to be in a specific format to be parsed.#
For example:
Your exported firebase user has the following credentials:
{
  "users": [
    {
      "localId": "userId",
      "email": "johnDoe@example.com"
      "passwordHash": "9Y8ICWcqbzmI42DxV1jpyEjbrJPG8EQ6nI6oC32JYz+/dd7aEjI/R7jG9P5kYh8v9gyqFKaXMDzMg7eLCypbOA==",
      "salt": "/cj0jC1br5o4+w==",
    }
  ]
}
The memory cost, rounds and salt separator retrived from the password hashing config are:
{
  mem_cost: 14,
  rounds: 8,
  base64_salt_separator: "Bw=="
}
The password hash would be the following: $f_scrypt$9Y8ICWcqbzmI42DxV1jpyEjbrJPG8EQ6nI6oC32JYz+/dd7aEjI/R7jG9P5kYh8v9gyqFKaXMDzMg7eLCypbOA==$/cj0jC1br5o4+w==$m=14$r=8$s=Bw==
The example password hash is in the following format $f_scrypt$<passwordHash>$<salt>$m=<mem_cost>$r=<rounds>$s=<base64_salt_separator>
Step 4: Use the formatted password hash in the import JSON file#
{
  "users": [
    {
      "loginMethods": [
        {
          "recipeId": "emailpassword",
          "tenantIds": ["public"],
          "isVerified": true,
          "isPrimary": true,
          "email": "johndoe@gmail.com",
          "passwordHash": "$f_scrypt$9Y8ICWcqbzmI42DxV1jpyEjbrJPG8EQ6nI6oC32JYz+/dd7aEjI/R7jG9P5kYh8v9gyqFKaXMDzMg7eLCypbOA==$/cj0jC1br5o4+w==$m=14$r=8$s=Bw==",
          "hashingAlgorithm": "firebase_scrypt",
          "timeJoinedInMSSinceEpoch": 1713260578868
        },
        {
          "recipeId": "thirdparty",
          "tenantIds": ["public"],
          "isVerified": true,
          "isPrimary": false,
          "email": "johndoe@gmail.com",
          "thirdPartyId": "google",
          "thirdPartyUserId": "106347997792363870000",
          "timeJoinedInMSSinceEpoch": 1713260578868
        }
      ]
    }
  ]
}
Step 2: Add the users for import#
To import users, make a POST request to the bulk import API with contents of the JSON file as the request body. The API supports up to 10,000 users per request. For larger files, submit multiple requests or use our script to automate the process.
A successful request will return a 200 response. If there are validation errors, you'll receive a 400 response with error messages, including the user's index in the input JSON. No users will be imported if validation errors occur. Retry after fixing the errors.
- Single app setup
- Multi app setup
curl --location --request POST '/bulk-import/users' \
--header 'api-key: ' \
--header 'Content-Type: application/json; charset=utf-8' \
--data-raw '{
  "users": [
    {
      "loginMethods": [
        {
          "recipeId": "emailpassword",
          "tenantIds": ["public"],
          "isVerified": true,
          "isPrimary": true,
          "email": "johndoe@gmail.com",
          "passwordHash": "$argon2d$v=19$m=12,t=3,p=1$aGI4enNvMmd0Zm0wMDAwMA$r6p7qbr6HD+8CD7sBi4HVw",
          "hashingAlgorithm": "argon2",
          "timeJoinedInMSSinceEpoch": 1713260578868
        },
        {
          "recipeId": "thirdparty",
          "tenantIds": ["public"],
          "isVerified": true,
          "isPrimary": false,
          "email": "johndoe@gmail.com",
          "thirdPartyId": "google",
          "thirdPartyUserId": "106347997792363870000",
          "timeJoinedInMSSinceEpoch": 1713260578868
        }
      ]
    }
  ]
}'
Step 3: Monitor the import status#
After adding users for import, a cron job will start processing them one by one. Initially, all entries will have the status NEW, which will change to PROCESSING as the cron job begins working through the list. If an entry fails, its status updates to FAILED, and an error message is recorded with the entry. Successfully imported entries are removed from the database.
You can check the import status by sending a GET request to the bulk import API. Use the status query parameter to filter results by NEW, PROCESSING, or FAILED.
Entries with FAILED status will contain the error message in the errorMessage field.
- Single app setup
- Multi app setup
curl --location --request GET '/bulk-import/users?status=FAILED' \
--header 'api-key: '
curl --location --request GET '/bulk-import/users?status=FAILED' \
--header 'api-key: '
An import is complete when there are no more entries with a NEW or PROCESSING status. If any entries have a FAILED status, you'll need to fix the errors and re-import them.
Step 4: Delete the failed entries#
Failed entries aren't automatically deleted. Remove them with a POST request to the remove bulk import users API. Deleting the entries is not required for re-importing them but it is a good practice to delete them to keep the data clean.
The response will indicate which entries were deleted and which couldn't be due to invalid IDs.
- Single app setup
- Multi app setup
curl --location --request POST '/bulk-import/users/remove' \
--header 'api-key: ' \
--header 'Content-Type: application/json; charset=utf-8' \
--data-raw '{
  "ids": ["29d90b2a-0e19-4d2c-b7b9-2005c2906f34", "bad3741b-a0d0-4ad3-b6aa-f4d38e1066a4"]
}'
curl --location --request POST '/bulk-import/users/remove' \
--header 'api-key: ' \
--header 'Content-Type: application/json; charset=utf-8' \
--data-raw '{
  "ids": ["29d90b2a-0e19-4d2c-b7b9-2005c2906f34", "bad3741b-a0d0-4ad3-b6aa-f4d38e1066a4"]
}'
